

How To Make Active Tabmenu As Different Background
Angular PrimeNG TabMenu Component
Angular PrimeNG is an open-source framework with a rich set of native Athwart UI components that are used for great styling and this framework is used to make responsive websites with very much ease. In this commodity, nosotros volition know how to use the TabMenu component in Angular PrimeNG.
TabMenu component: It is used to make a navigation bar that will display the nav items as a nav header ie., information technology is a menu in the class of tabs.
Properties:
- model: Information technology is an array of menu items. Information technology accepts the array every bit an input data blazon & the default value is zippo.
- activeItem: It defines the default active menu item. It accepts the menu detail equally an input blazon & the default value is null.
- manner: It sets the inline style of the component. Information technology accepts the string as an input data type & the default value is null.
- styleClass: It is the way class of the component. It accepts the cord every bit an input data blazon & the default value is null.
Styling:
- p-tabmenu: Information technology is a container chemical element.
- p-tabmenu-nav: It is a list element of headers.
- p-tabmenuitem: It is an element for the bill of fare items.
- p-menuitem-link: Information technology is a link inside a menu item.
- p-menuitem-text: It is a characterization of a menu particular.
- p-menuitem-icon: It is an icon of a menu item.
Creating Angular awarding & module installation:
Stride 1: Create an Angular application using the following command.
ng new appname
Stride ii: Afterward creating your projection folder i.e. appname, move to it using the following command.
cd appname
Step 3: Install PrimeNG in your given directory.
npm install primeng --salve npm install primeicons --salve
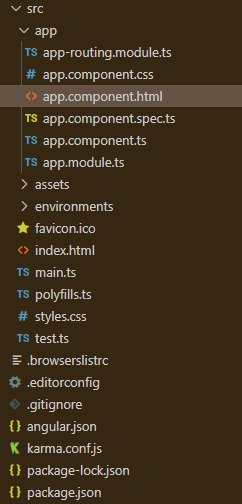
Project Structure: After the complete installation, information technology will look similar the following:
Example one: This is the bones instance that shows how to use the TabMenu component.
app.component.html
< h2 >GeeksforGeeks</ h2 >
< h5 >PrimeNG TabMenu Component</ h5 >
< p-tabMenu [model]="gfg"></ p-tabMenu >
app.component.ts
import { Component } from '@angular/core' ;
import { MenuItem } from 'primeng/api' ;
@Component({
selector: 'my-app' ,
templateUrl: './app.component.html'
})
consign course AppComponent {
gfg: MenuItem[];
ngOnInit() {
this .gfg = [
{
label: 'HTML'
},
{
label: 'AngularJS'
},
{
characterization: 'ReactJS'
},
{
characterization: 'PrimeNG'
}
];
}
}
app.module.ts
import { NgModule } from '@angular/core' ;
import { BrowserModule } from '@angular/platform-browser' ;
import { RouterModule } from '@angular/router' ;
import { BrowserAnimationsModule }
from '@angular/platform-browser/animations' ;
import { AppComponent } from './app.component' ;
import { TabMenuModule } from 'primeng/tabmenu' ;
@NgModule({
imports: [
BrowserModule,
BrowserAnimationsModule,
TabMenuModule,
RouterModule.forRoot([{ path: '' ,
component: AppComponent }])
],
declarations: [AppComponent],
bootstrap: [AppComponent]
})
consign class AppModule {}
Output:

Example two: In this example, the outset item ie., HTML, in this case, will be pre-selected while loading the page for the start time.
app.component.html
< h2 >GeeksforGeeks</ h2 >
< h5 >PrimeNG TabMenu Component</ h5 >
< p-tabMenu [model]="gfg" [activeItem]="activeItem"></ p-tabMenu >
app.component.ts
import { Component } from '@angular/core' ;
import { MenuItem } from 'primeng/api' ;
@Component({
selector: 'my-app' ,
templateUrl: './app.component.html'
})
export course AppComponent {
gfg: MenuItem[];
activeItem: MenuItem;
ngOnInit() {
this .gfg = [
{
characterization: 'HTML'
},
{
label: 'AngularJS'
},
{
characterization: 'ReactJS'
},
{
label: 'PrimeNG'
}
];
this .activeItem = this .gfg[0];
}
}
app.module.ts
import { NgModule } from '@athwart/core' ;
import { BrowserModule } from '@athwart/platform-browser' ;
import { RouterModule } from '@angular/router' ;
import { BrowserAnimationsModule }
from '@athwart/platform-browser/animations' ;
import { AppComponent } from './app.component' ;
import { TabMenuModule } from 'primeng/tabmenu' ;
@NgModule({
imports: [
BrowserModule,
BrowserAnimationsModule,
TabMenuModule,
RouterModule.forRoot([{ path: '' ,
component: AppComponent }])
],
declarations: [AppComponent],
bootstrap: [AppComponent]
})
export class AppModule {}
Output:

Reference: https://primefaces.org/primeng/showcase/#/tabmenu

How To Make Active Tabmenu As Different Background,
Source: https://www.geeksforgeeks.org/angular-primeng-tabmenu-component/
Posted by: warrendanythas.blogspot.com
0 Response to "How To Make Active Tabmenu As Different Background"
Post a Comment